3D-Content
The 3D-Content section is a Collection Type that allows you to manage all the 3D-Models used in your application. By creating a 3D-Content entry, you can define how an object is displayed, its position and scale, and make it available for use in your showrooms.
PREPERATION
It is recommended to organize your 3D-Models and thumbnails in the Media Library first, before managing them here.
Video Tutorial
This video tutorial guides you through the entire process of uploading and managing a 3D object. You will learn how to create a new 3D-Content entry, set its presentation options, adjust its position, rotation, and scale, and publish the object to make it appear in your showrooms.
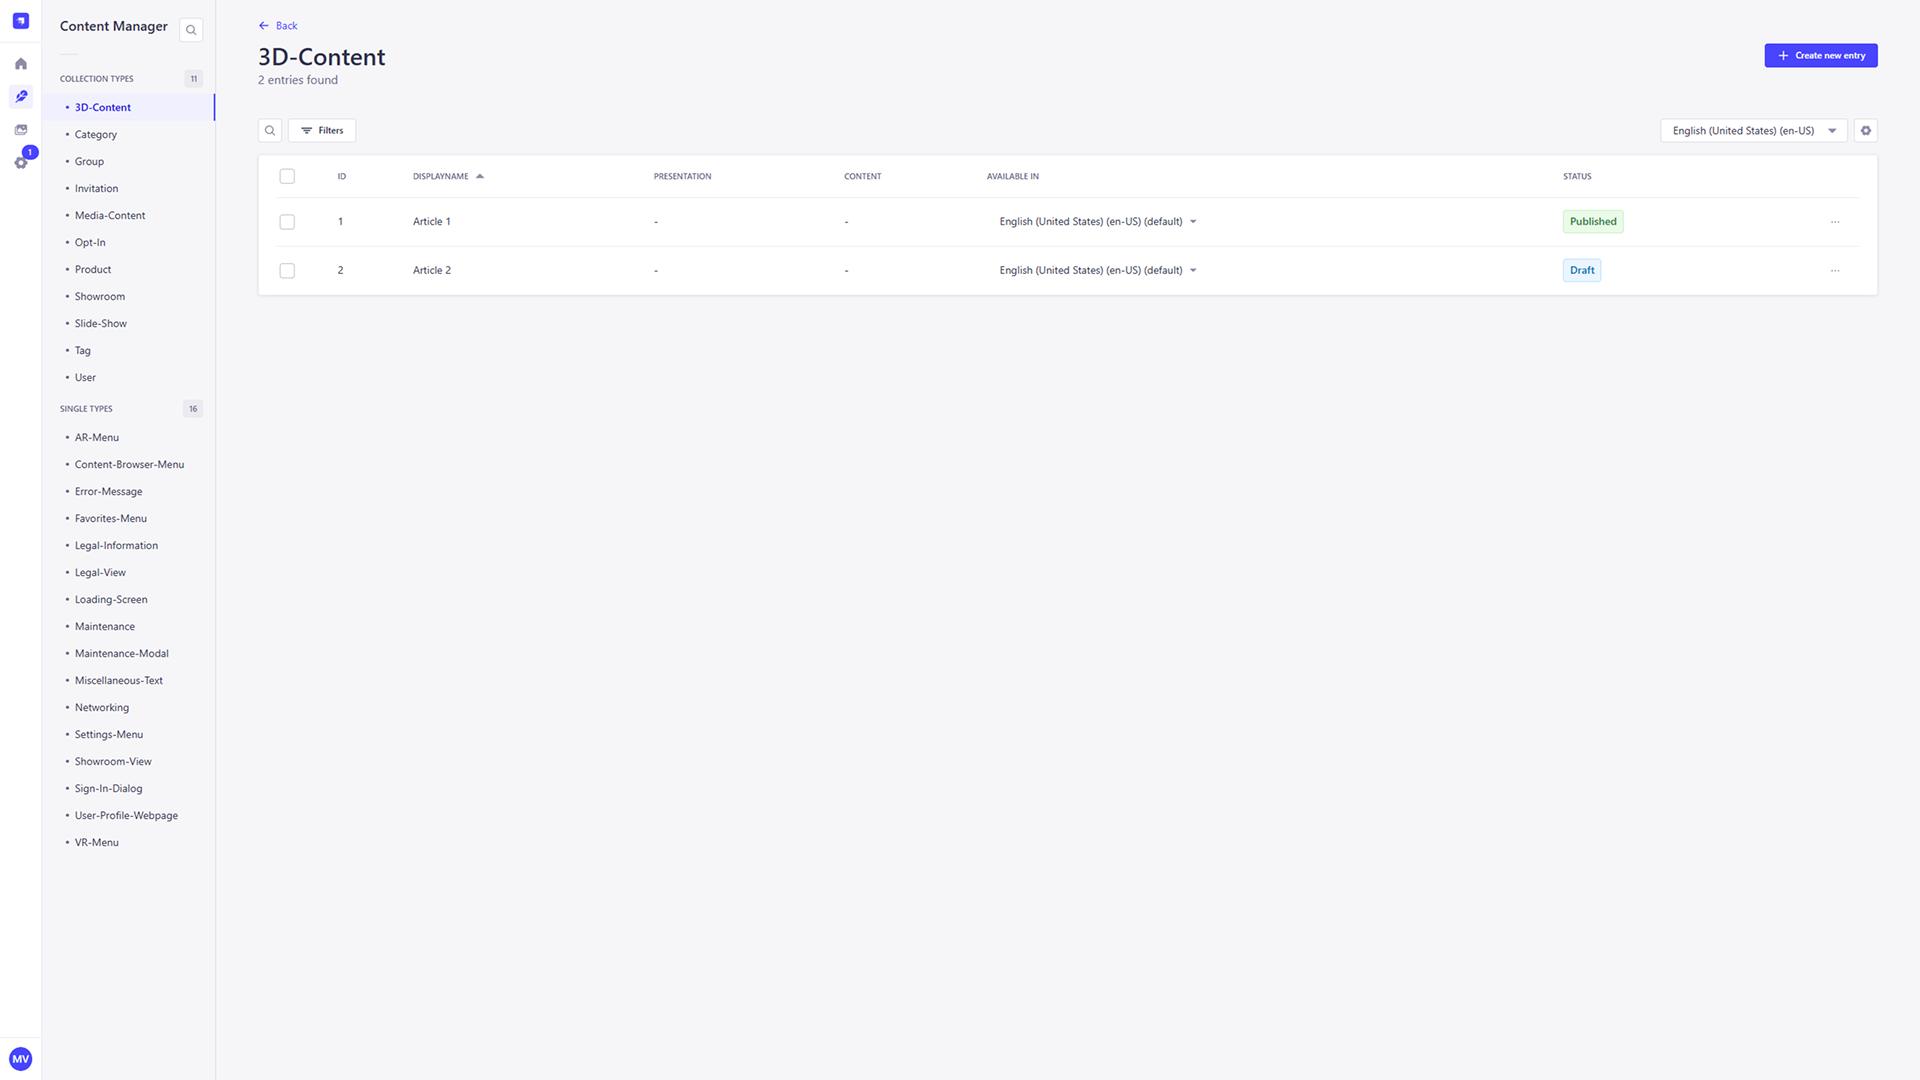
Overview
This section provides a structured list of all 3D-Content entries available in the system. Each entry includes key information such as Display Name and language availability, along with its current Status (e.g., Published or Draft).
Adding a new 3D-Content entry
To create a new 3D-Content entry, click the + Create new entry button located at the top right of the 3D-Content view. This will open the entry editor where you can upload your 3D model and define all its relevant data.
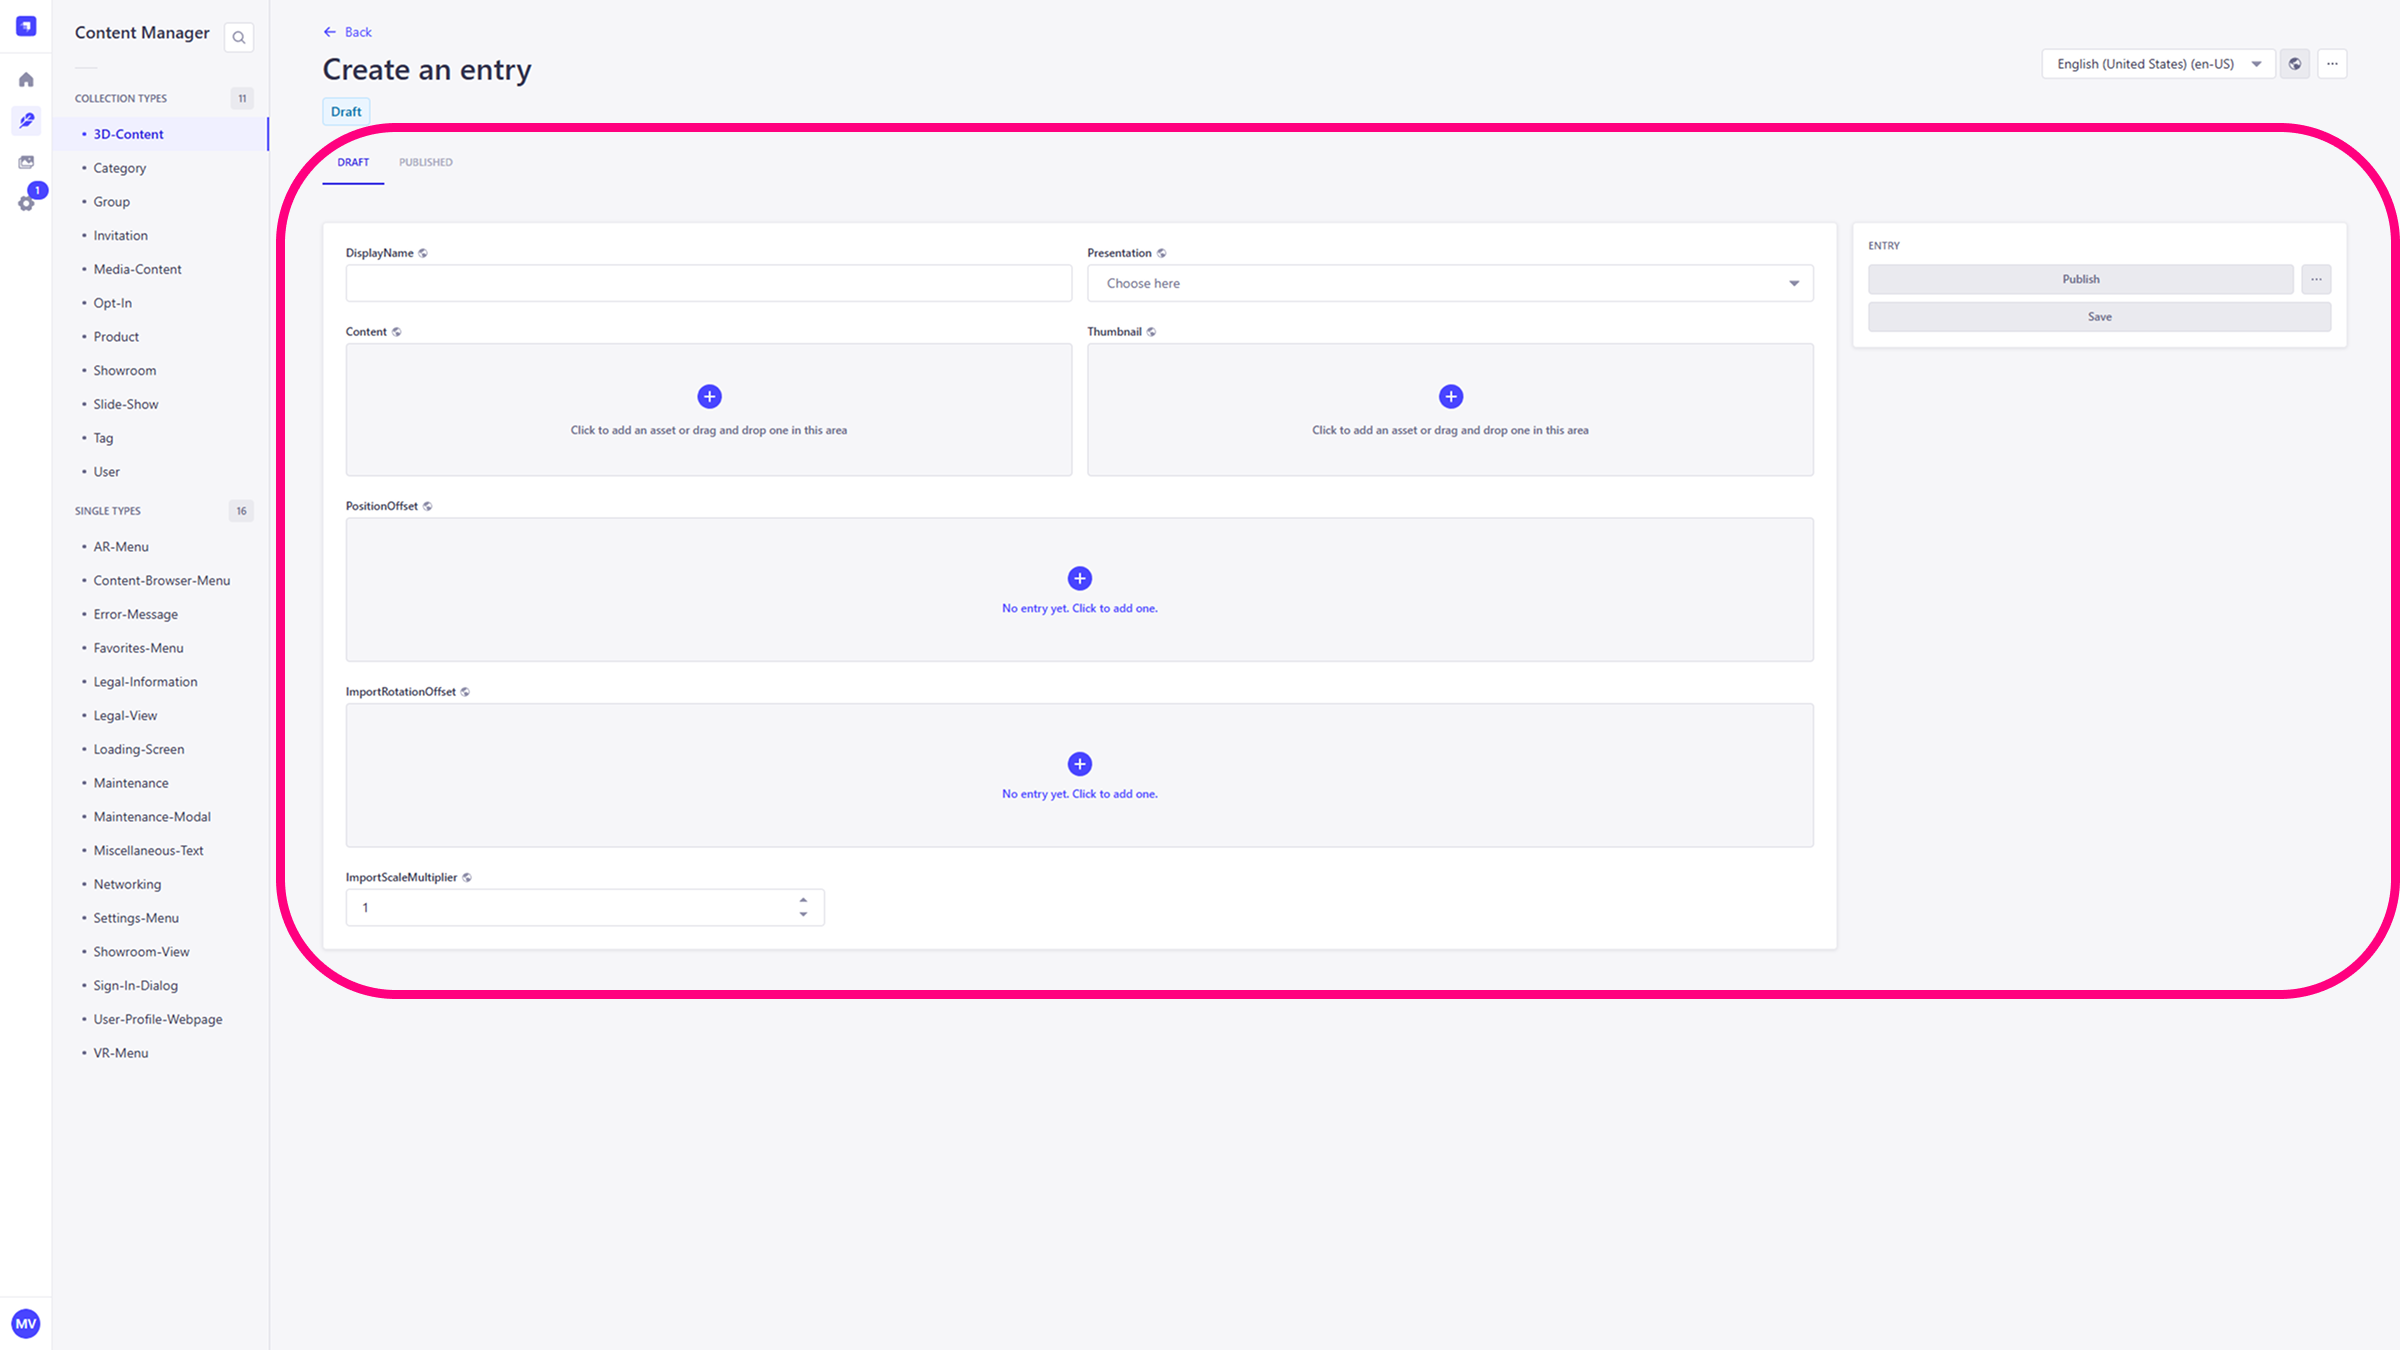
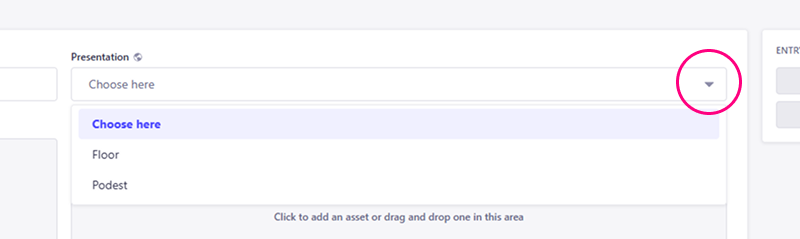
Presentation
Use the Presentation dropdown to define how the 3D object should appear in the scene.
- Floor: The object will be placed directly on the ground.
- Podest: The object will be elevated on a presentation platform.
Content
This field is where you assign your 3D object file. You can either drag and drop an asset (e.g., .stp, .glb, .fbx) directly into this area or click the + button to open a selection window with your Media Library assets. Within this window, you can browse and select existing assets, as well as upload and organize new files, with all changes instantly synchronized to your Media Library.
Thumbnail
Use this field to define the preview image for your 3D object. The optimal resolution for thumbnails is 340x250. Click the + button or drag and drop an image into this area. The image will be displayed in the 3D-Model Tab in your app.
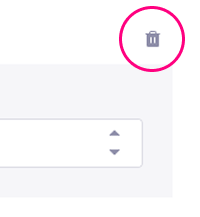
Position & Rotation Offset
You can adjust the 3D model’s placement within the scene by defining its position (x, y, z) and rotation. Click the + button to add a new offset and enter values to shift or rotate the model after import. Click the trash icon to remove a previously defined offset and reset its values to their default.

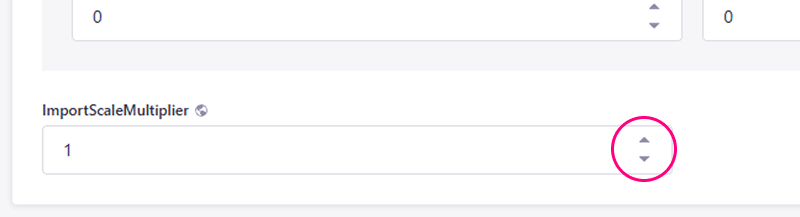
Import Scale Multiplier
Use this input field to define the scale factor at which the 3D object should be imported. A value of 1 keeps the original size. You can increase or decrease the value to scale the object proportionally during import. For example, a value of 2 would make the object twice as large, while a value of 0.5 would make it half its original size.
Save & Publish
After filling in the required fields, click Save to store the entry as a Draft, or click Publish to make it immediately available in the application.