Controls
To navigate the virtual showroom and interact with its elements, users can rely on intuitive control schemes optimized for mouse and keyboard, as well as VR and touch interfaces. This section explains how to move, look around, and interact with the environment.
Orbit Camera
The orbit camera lets users navigate around the scene using mouse input. It supports three core interactions:
Rotate
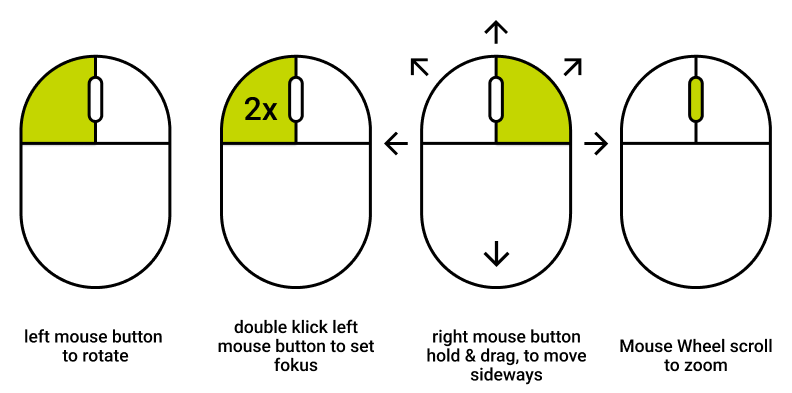
Hold the left mouse button and drag the mouse to rotate around the focal point.
Pan
Hold the right mouse button and drag the mouse to move the view sideways or vertically within the scene.
Set Focus
Double-click with the left mouse button to set a new focus point at the clicked location. The camera will center on this point.
Zoom
Scroll the mouse wheel forward or backward to move the camera closer to or further away from the focal point.
First Person Controls
Navigate the virtual space using your keyboard and mouse.
Mouse Controls
- Right Mouse Button (Hold + Move)
Look around freely by dragging the mouse. - Left Mouse Button (Click)
Interact with UI elements and objects in the virtual space.

Keyboard Controls
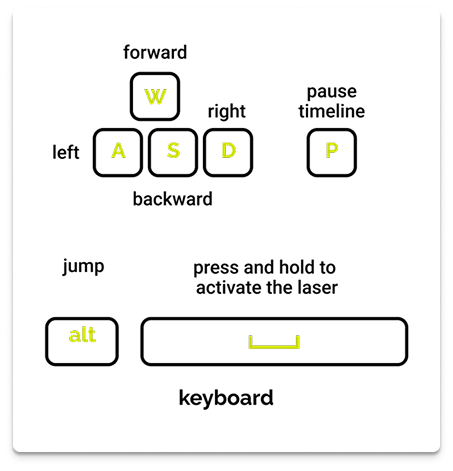
- W / A / S / D: Move forward / left / backward / right
- Alt: Jump
- Space (Hold): Activate the laser pointer to highlight objects
- P: Pause the timeline
VR Controller
Use your VR controllers to move around, interact, and access menus within the virtual space. The left controller is primarily dedicated to movement and opening menus, while the right controller is dedicated to interaction and teleportation.
Menus (Left Controller)
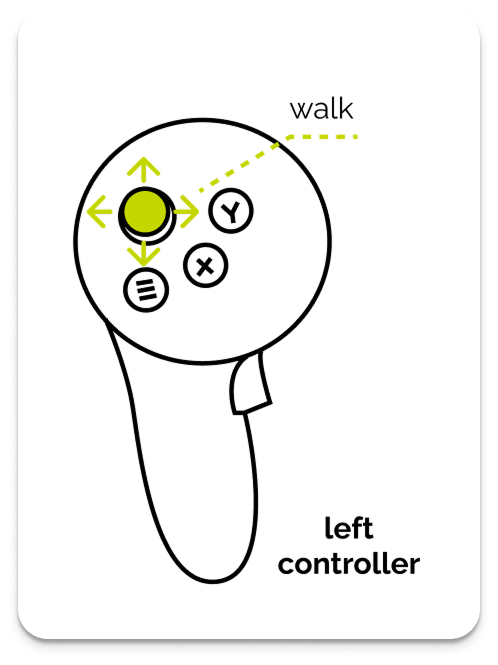
The left controller is used to access and operate menus.
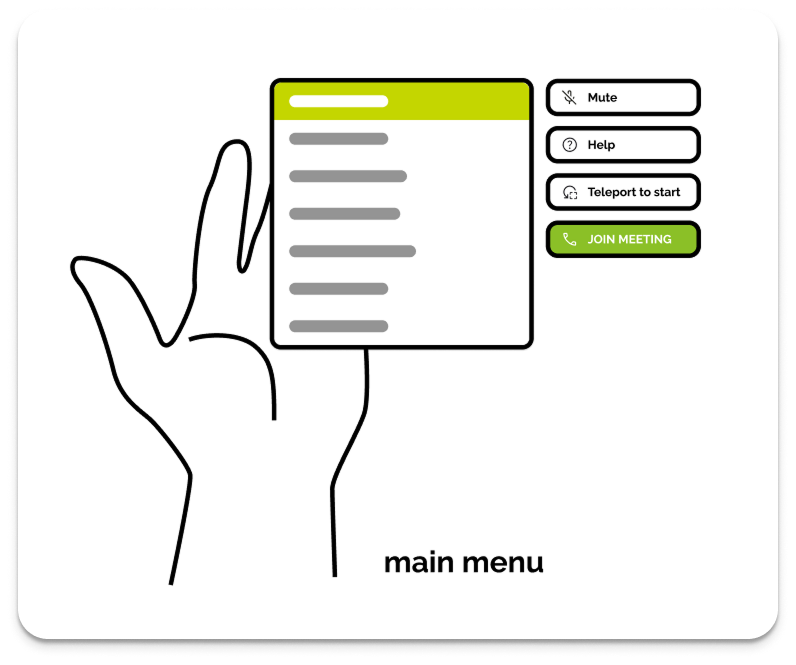
- Button X: Open the main menu
Once the Main Menu is open, use the right controller's pointer to activate the following options:
- Join Meeting (green): Instantly enters a multi-user session.
- Mute: Mutes or unmutes your microphone in a multi-user session.
- Help: Opens a help overlay, which displays illustrations of the controls.
- Teleport to Start: Resets your position to the starting point.

Walking (Left Controller)
- Joystick: Move in any direction
Motion sickness
Continuous walking might cause motion sickness. If so, consider using teleportation instead.
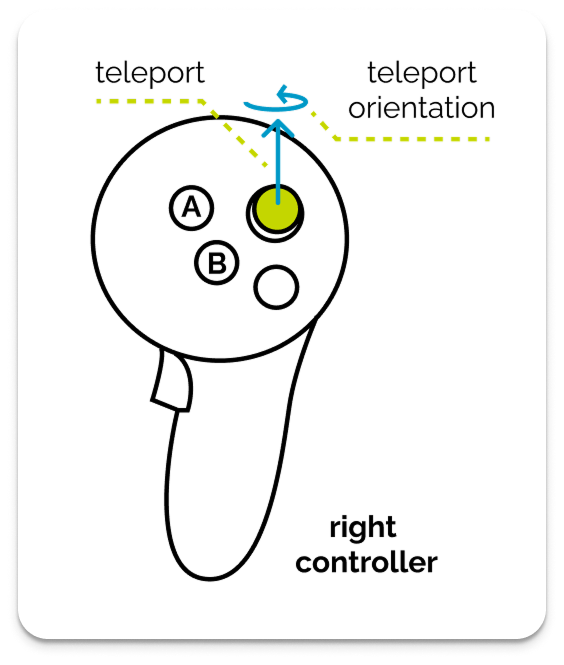
Teleporting (Right Controller)
To teleport, push the joystick forward. A teleport arc will appear with an indicator on the ground, showing the direction you will face. Rotate the joystick left or right to adjust this final orientation. The teleport is activated when you release the joystick.
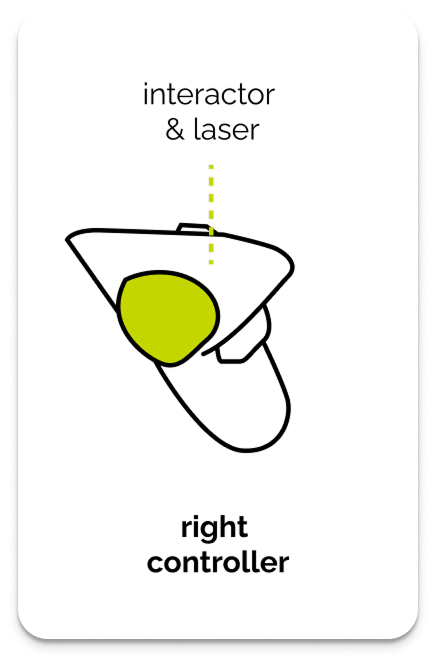
Laserpointer & interaction (Right Controller)
The index finger trigger on the right controller activates the interactor, which is used to operate all menus and UI elements. The interaction works via two methods:
- Pointer (Far Interaction): When you are far from a UI element, a visible laser line (pointer) extends from your controller. Pulling the trigger activates the selected element.
- Poke (Near Interaction): As you move the controller close to a UI element, the pointer automatically deactivates, allowing you to directly poke the buttons with the controller tip.
The laser pointer is a visual aid that is only visible in multi-user sessions. It functions as a presentation tool, allowing you to highlight objects in the showroom to draw the attention of all participants.
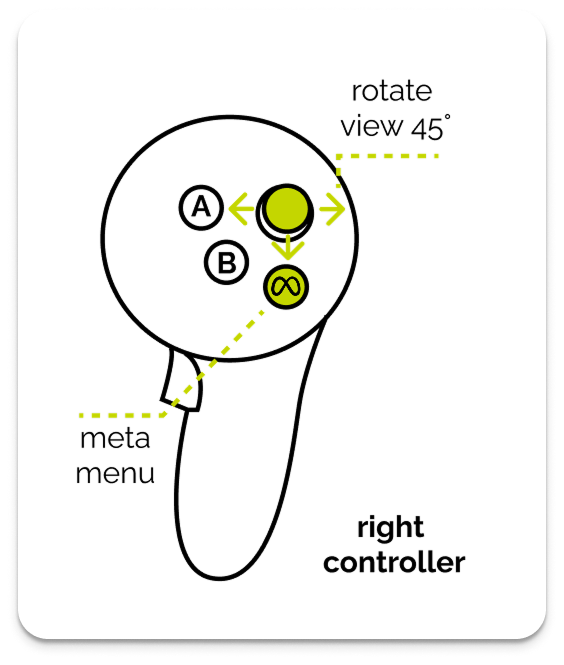
Rotate (Right Controller)
- Joystick Left/Right: Turn the right joystick to the respective direction to snap-rotate in 45° increments.
- Meta Button: Opens the Meta Menu for system settings and options
VR Hand Gesture
Interact naturally using your hands in VR — no controller required. Use intuitive gestures like pointing, pinching, or poking to navigate and interact with the virtual environment.
Main Menu
To open the Main Menu, turn your palm upward in a natural gesture. This gesture provides quick access to important options and controls.
The Main Menu includes the following options:
Join Meeting: Join a multi-user sessionTutorial: Open a tutorial element for hand gestures- Presentation Page: Quickly access showroom hotspots and their animation player
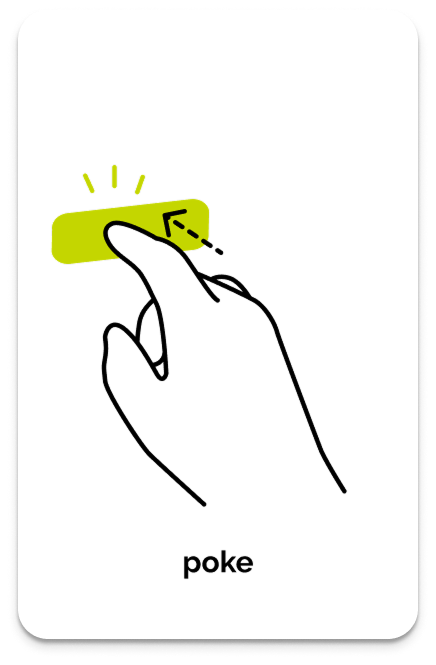
Poke
- Gesture: Extend your index finger and push forward. It works like tapping on a touchscreen. Quick and naturally used for pressing buttons.
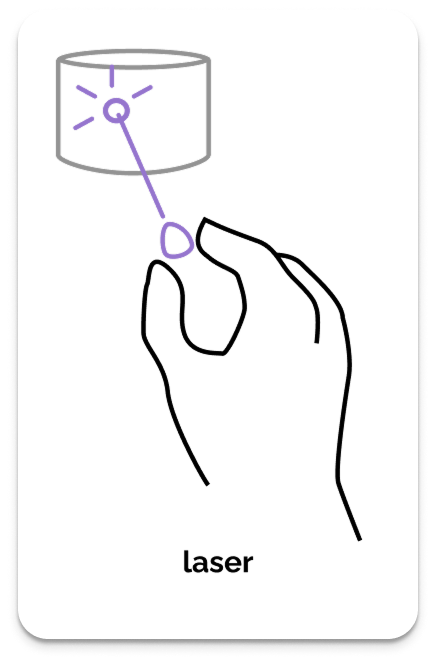
Laser Pointer
- Gesture: Pinch your index finger and thumb together. Activates a visible laser beam in your profile color. Great for pointing out features to others in the session.
Interaction
In VR environments with Hand tracking enabled, you can interact with the app's UI elements and content using natural gestures.
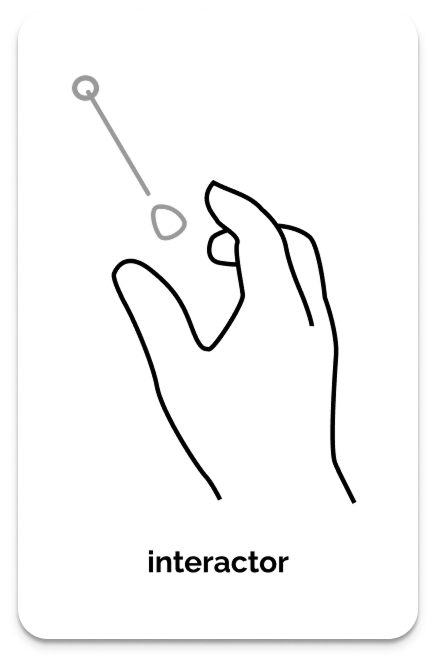
Indicator (Pointing)
- Gesture: Bring your index finger and thumb close without pinching.
- Result: This action activates the interaction indicator. Aim precisely at UI elements or content.
- Snap Feature: When the Indicator is near an interactive object, it will snap onto the element and change to the primary color, making it easier to select.
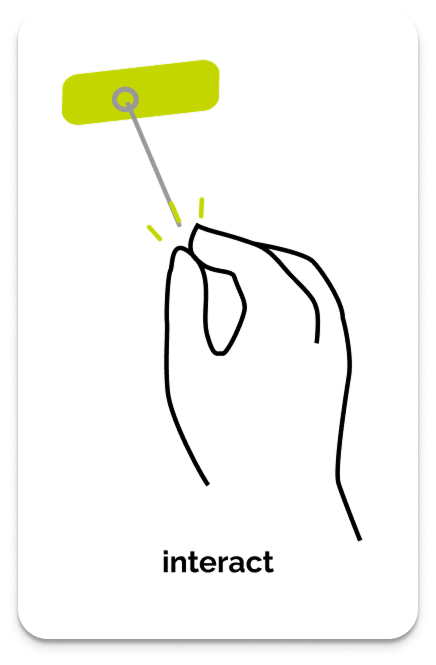
Select (Clicking)
- Action: When the indicator has snapped onto a target element (such as a button), pinch your index finger and thumb together to activate the selection.
Indicator (Pointing)
Select (Pinch to click)
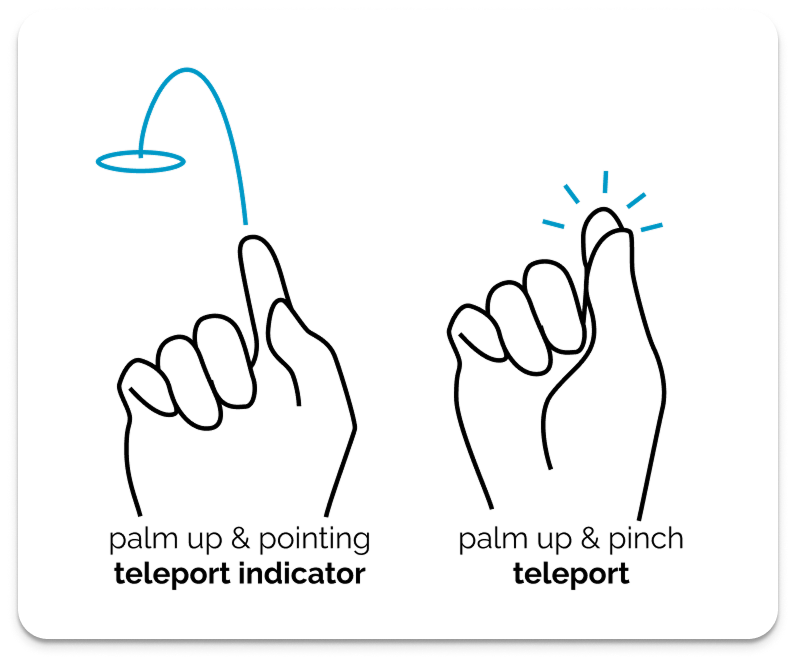
Teleport
Use the teleport function to move instantly within the showroom when Hand tracking is active.
Indicator (Pointing)
- Gesture: Palm up + pointing gesture
- Result: This action activates the teleport indicator. Aim the spot to teleport.
Select (Clicking)
- Action: When the indicator is pointing your target teleport spot, pinch your index finger and thumb together to activate the selection.